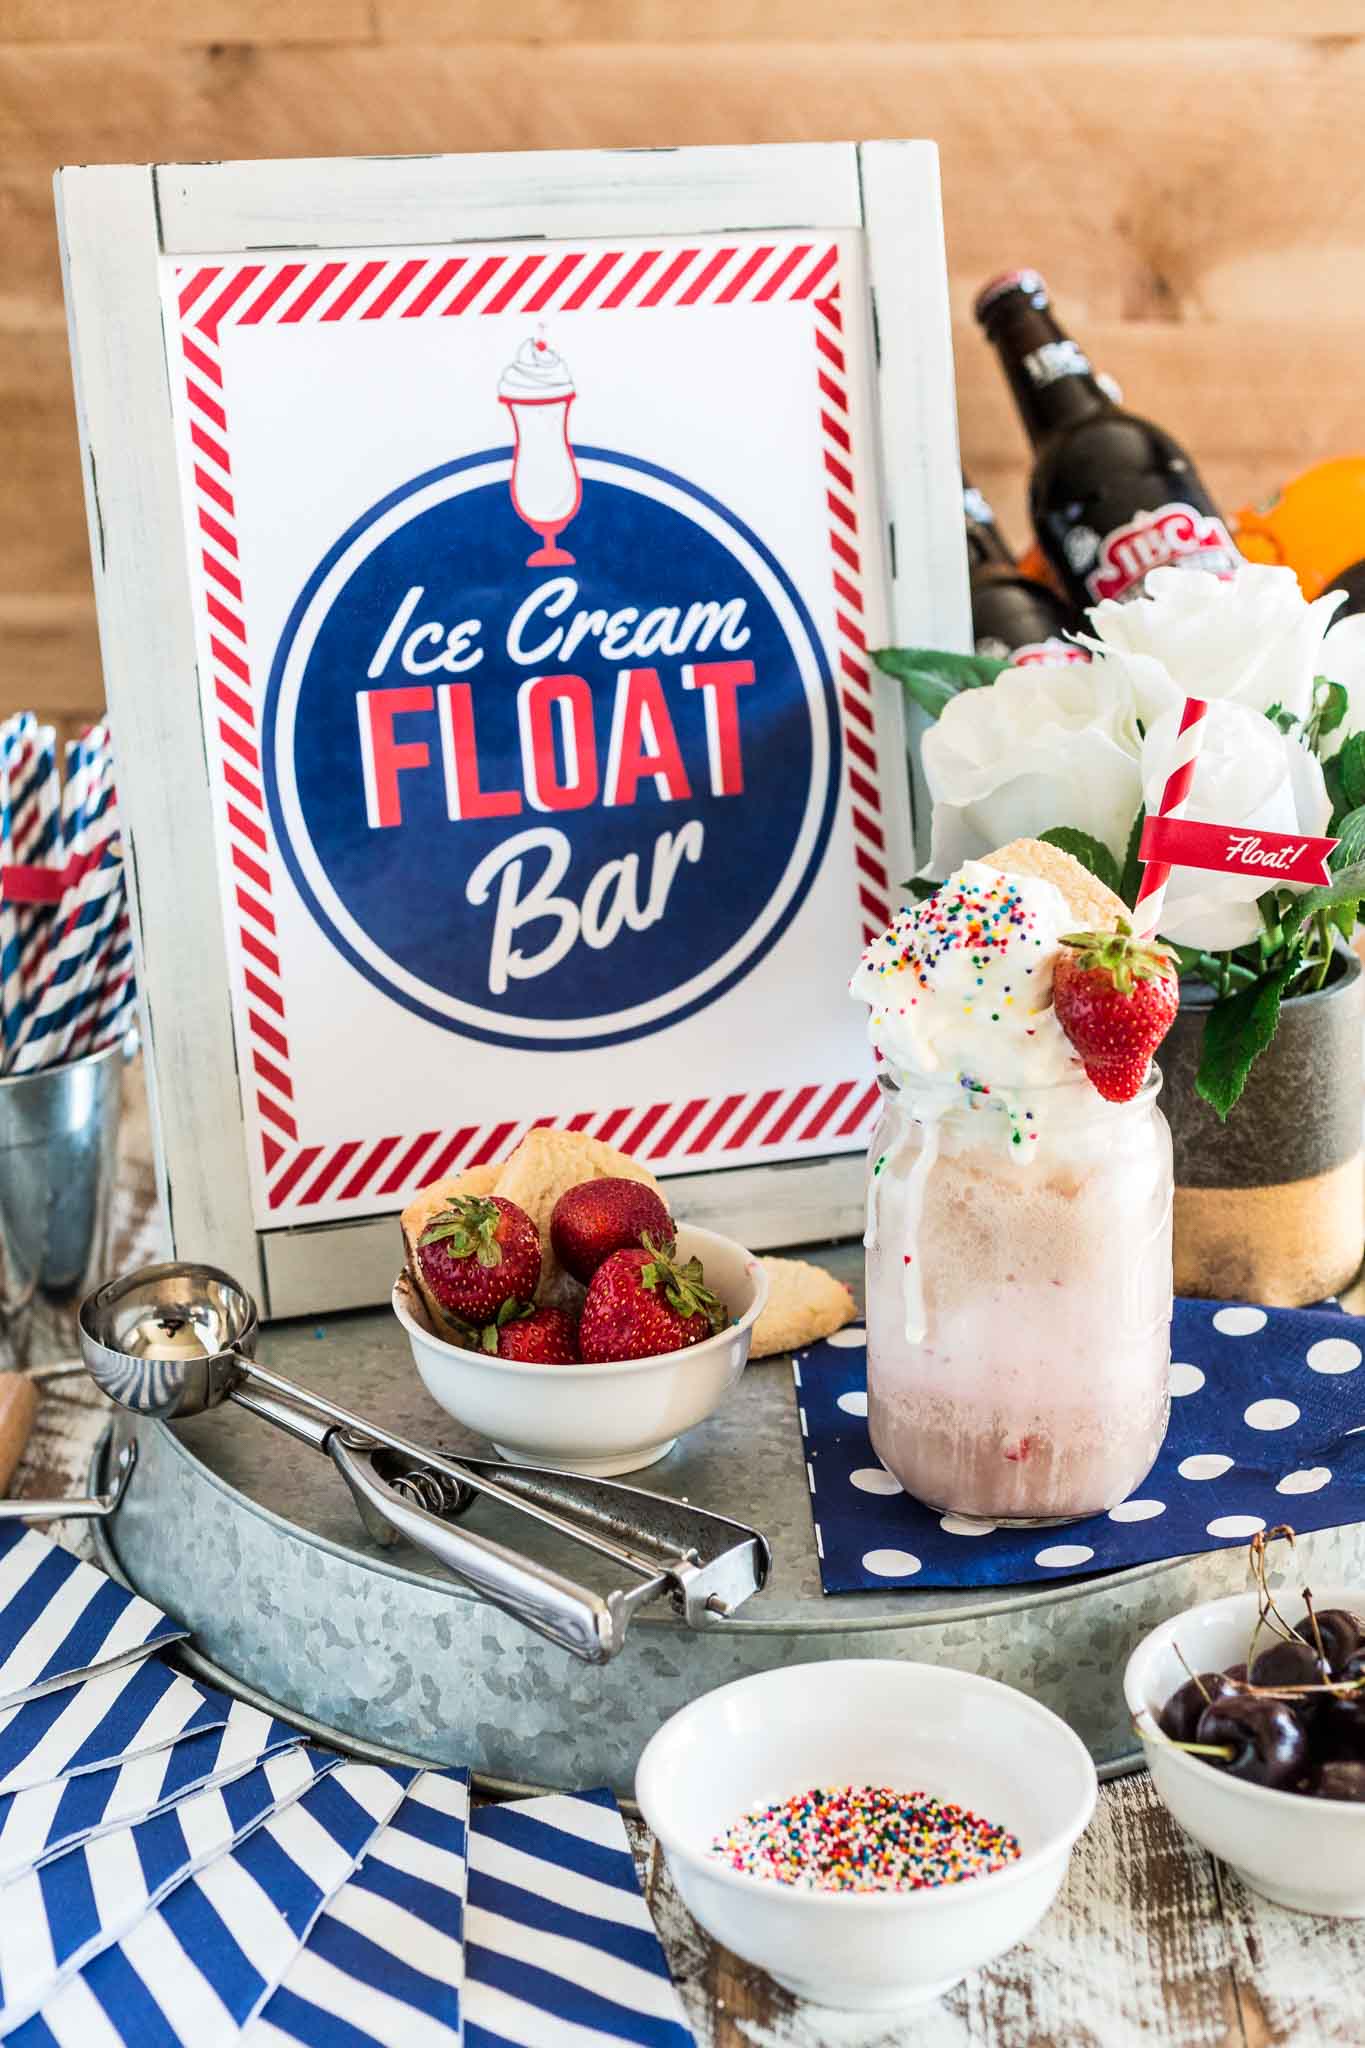
Here I am again with another build-your-own party station idea! Can you tell I’m obsessed? My last party involved a beautiful and delicious Bruschetta Bar. This time, maybe inspired by the insanely hot weather here in the East Coast, I decided to go with something involving ice cream and soda. The results? A very fun and retro Ice Cream Float Bar that is destined to be a hit! Because who doesn’t love a classic ice cream float?
The setup couldn’t be easier. All you need are a few flavors of ice cream, some bottles of soda and festive toppings. Say goodbye to party planning stress! Party stations are a trend for a reason: it’s minimal work in exchange for lots of fun and engaged guests. What could be better than that? If you’re anything like me, you will also want to decorate the station (or even the whole party) in a 50’s diner feel. But don’t you worry, I got some printables for you to make your life easier! But enough with the talking. It’s time to get this party started! Here’s a step-by-step guide to setting up your own customized ice cream float bar.
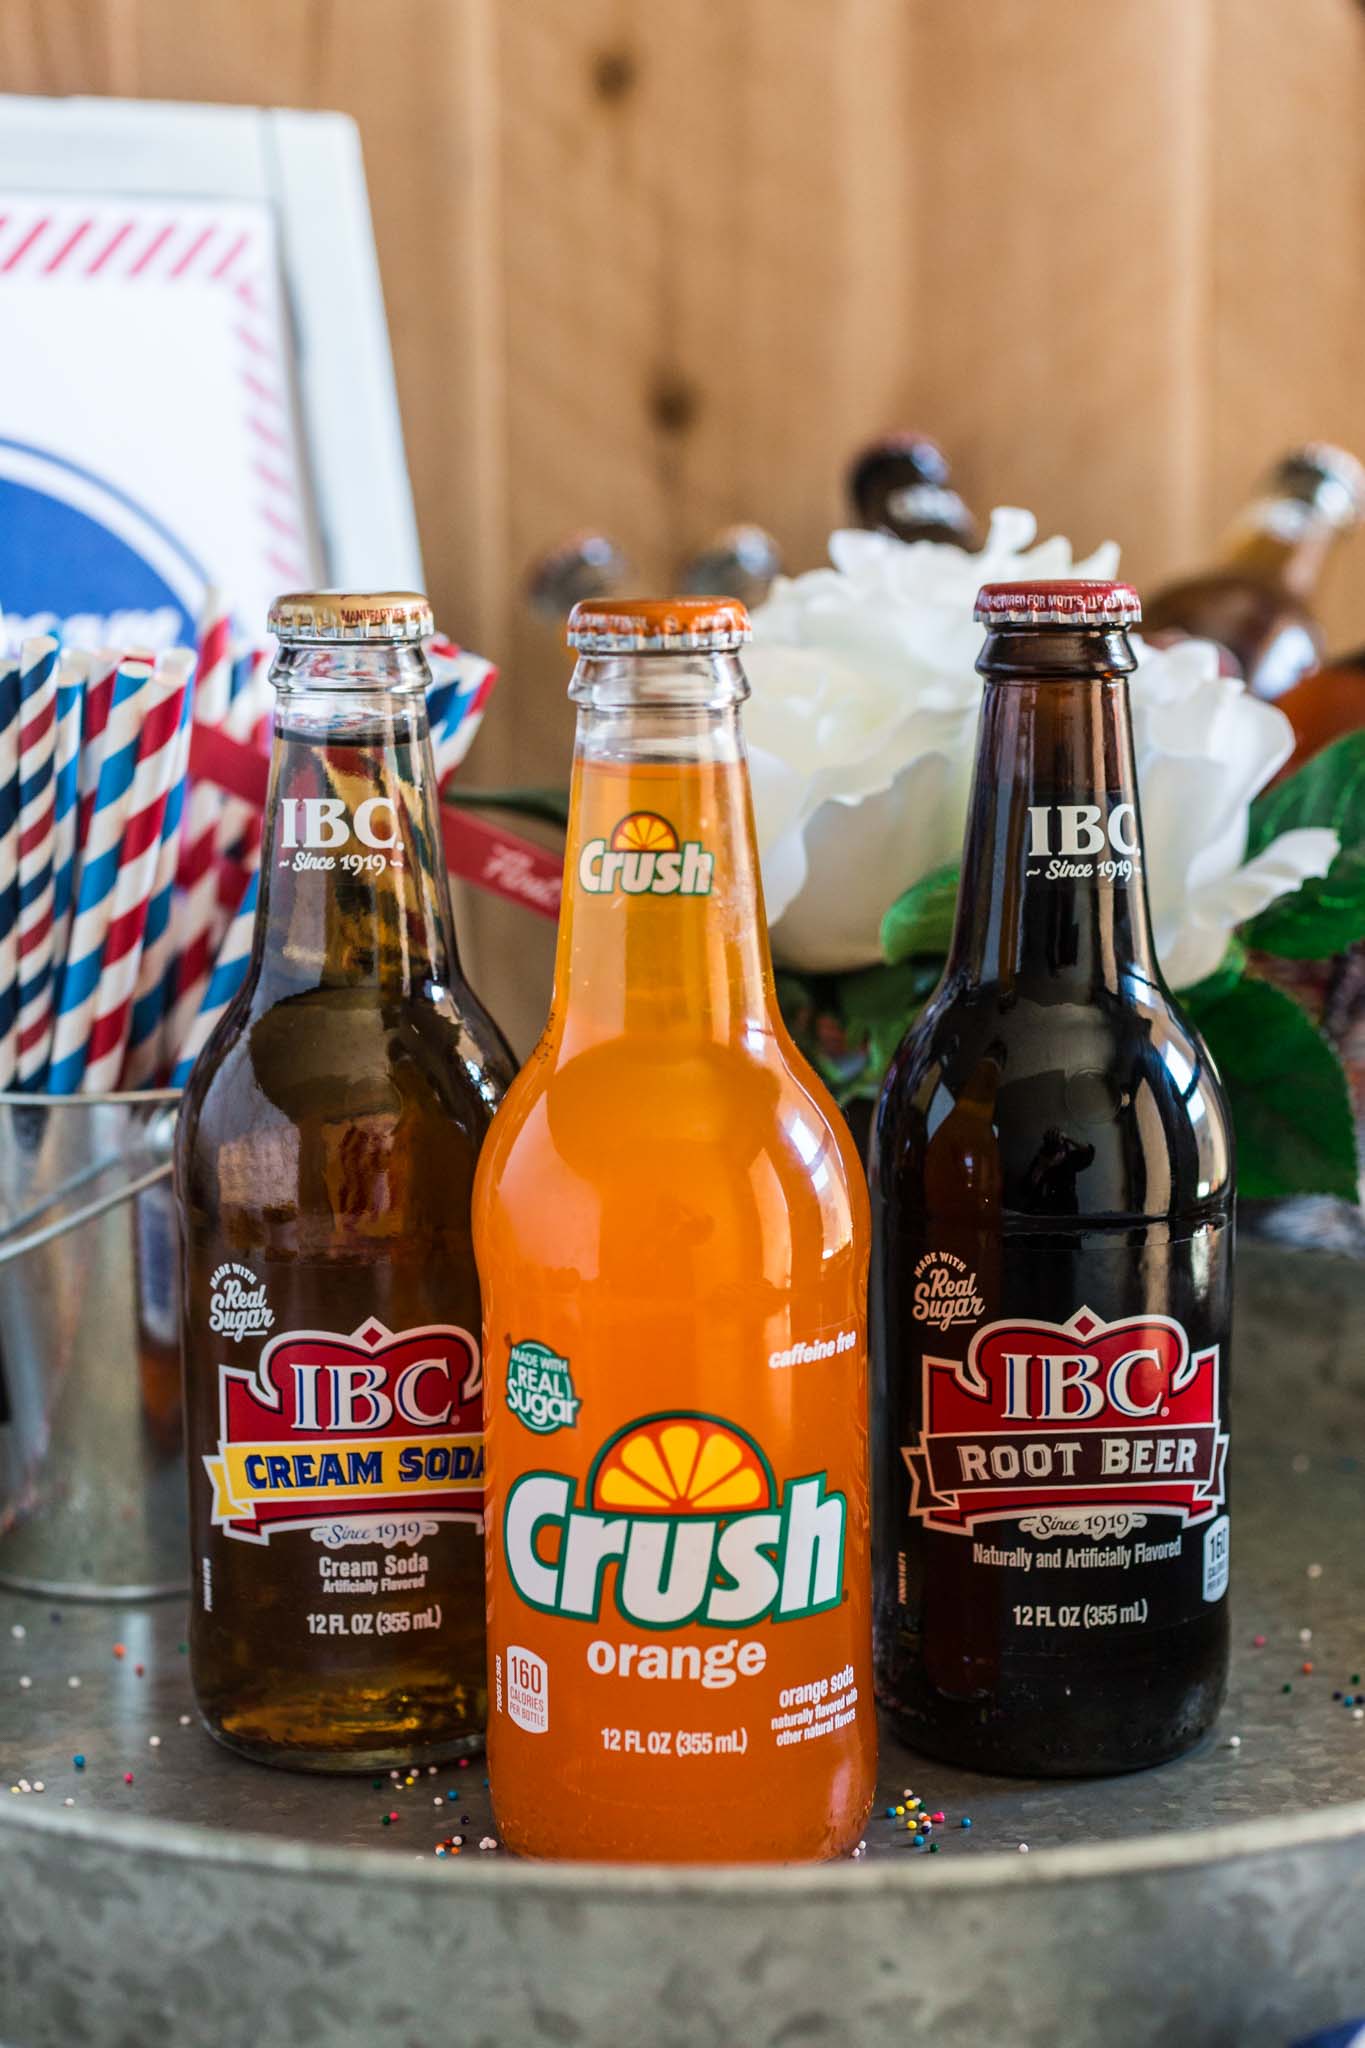
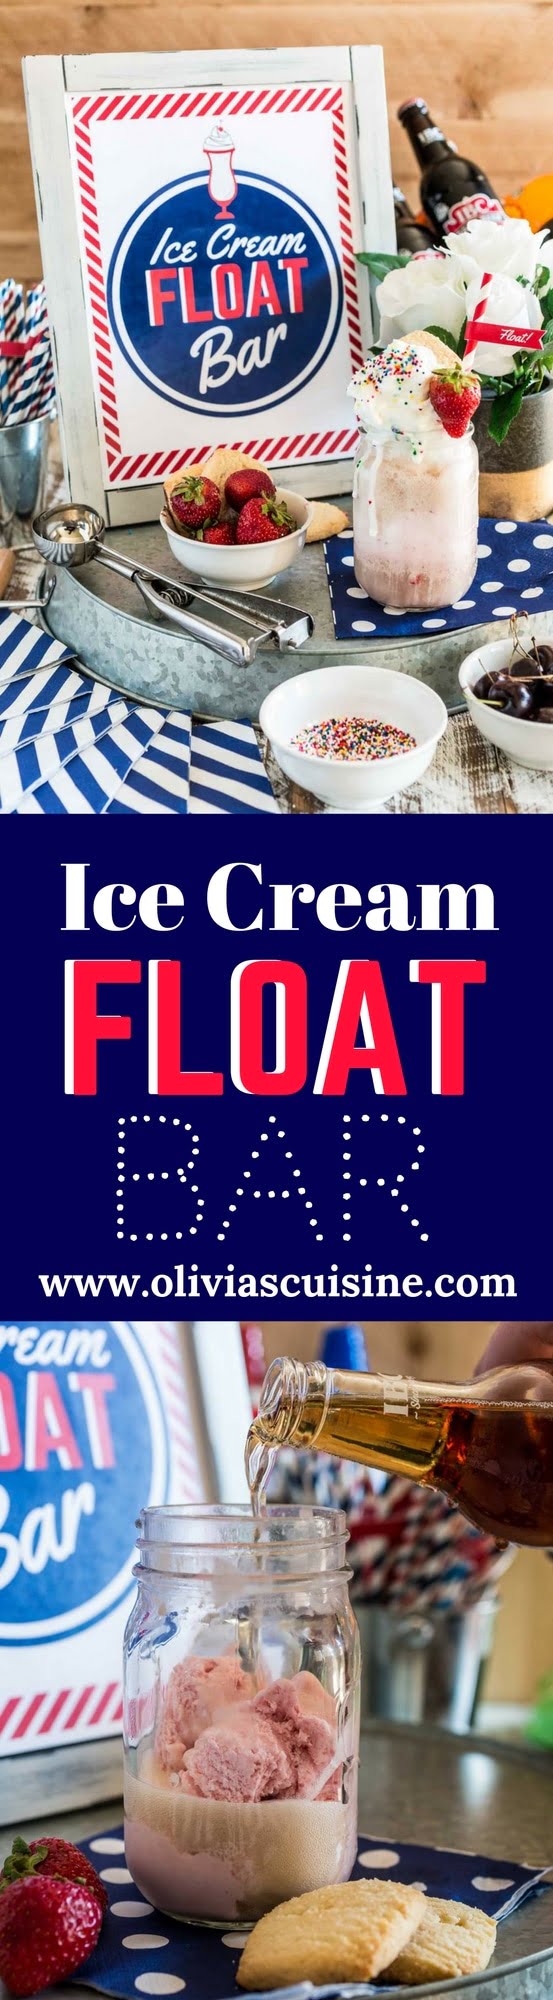
STEP ONE: Beverages
Sure, we all think of root beer when we think of a classic soda float, but variety is the key to a DIY station’s success. Think glass bottled sodas, juices, chocolate milk, even cold brewed coffee and/or a few bottles of stout for the adults. Three to four variety of sodas and/or some of the other beverages mentioned above are more than enough for a lot of fun combinations. Oh, and don’t forget to leave a bottle opener or two at the station, because your guests won’t be able to make their floats if they can’t open the soda bottles. (If your guests are children, maybe try to remember of opening a few bottles every now and then, so they don’t have to deal with the bottle opener. Safety comes first, always!)
STEP TWO: Ice Cream
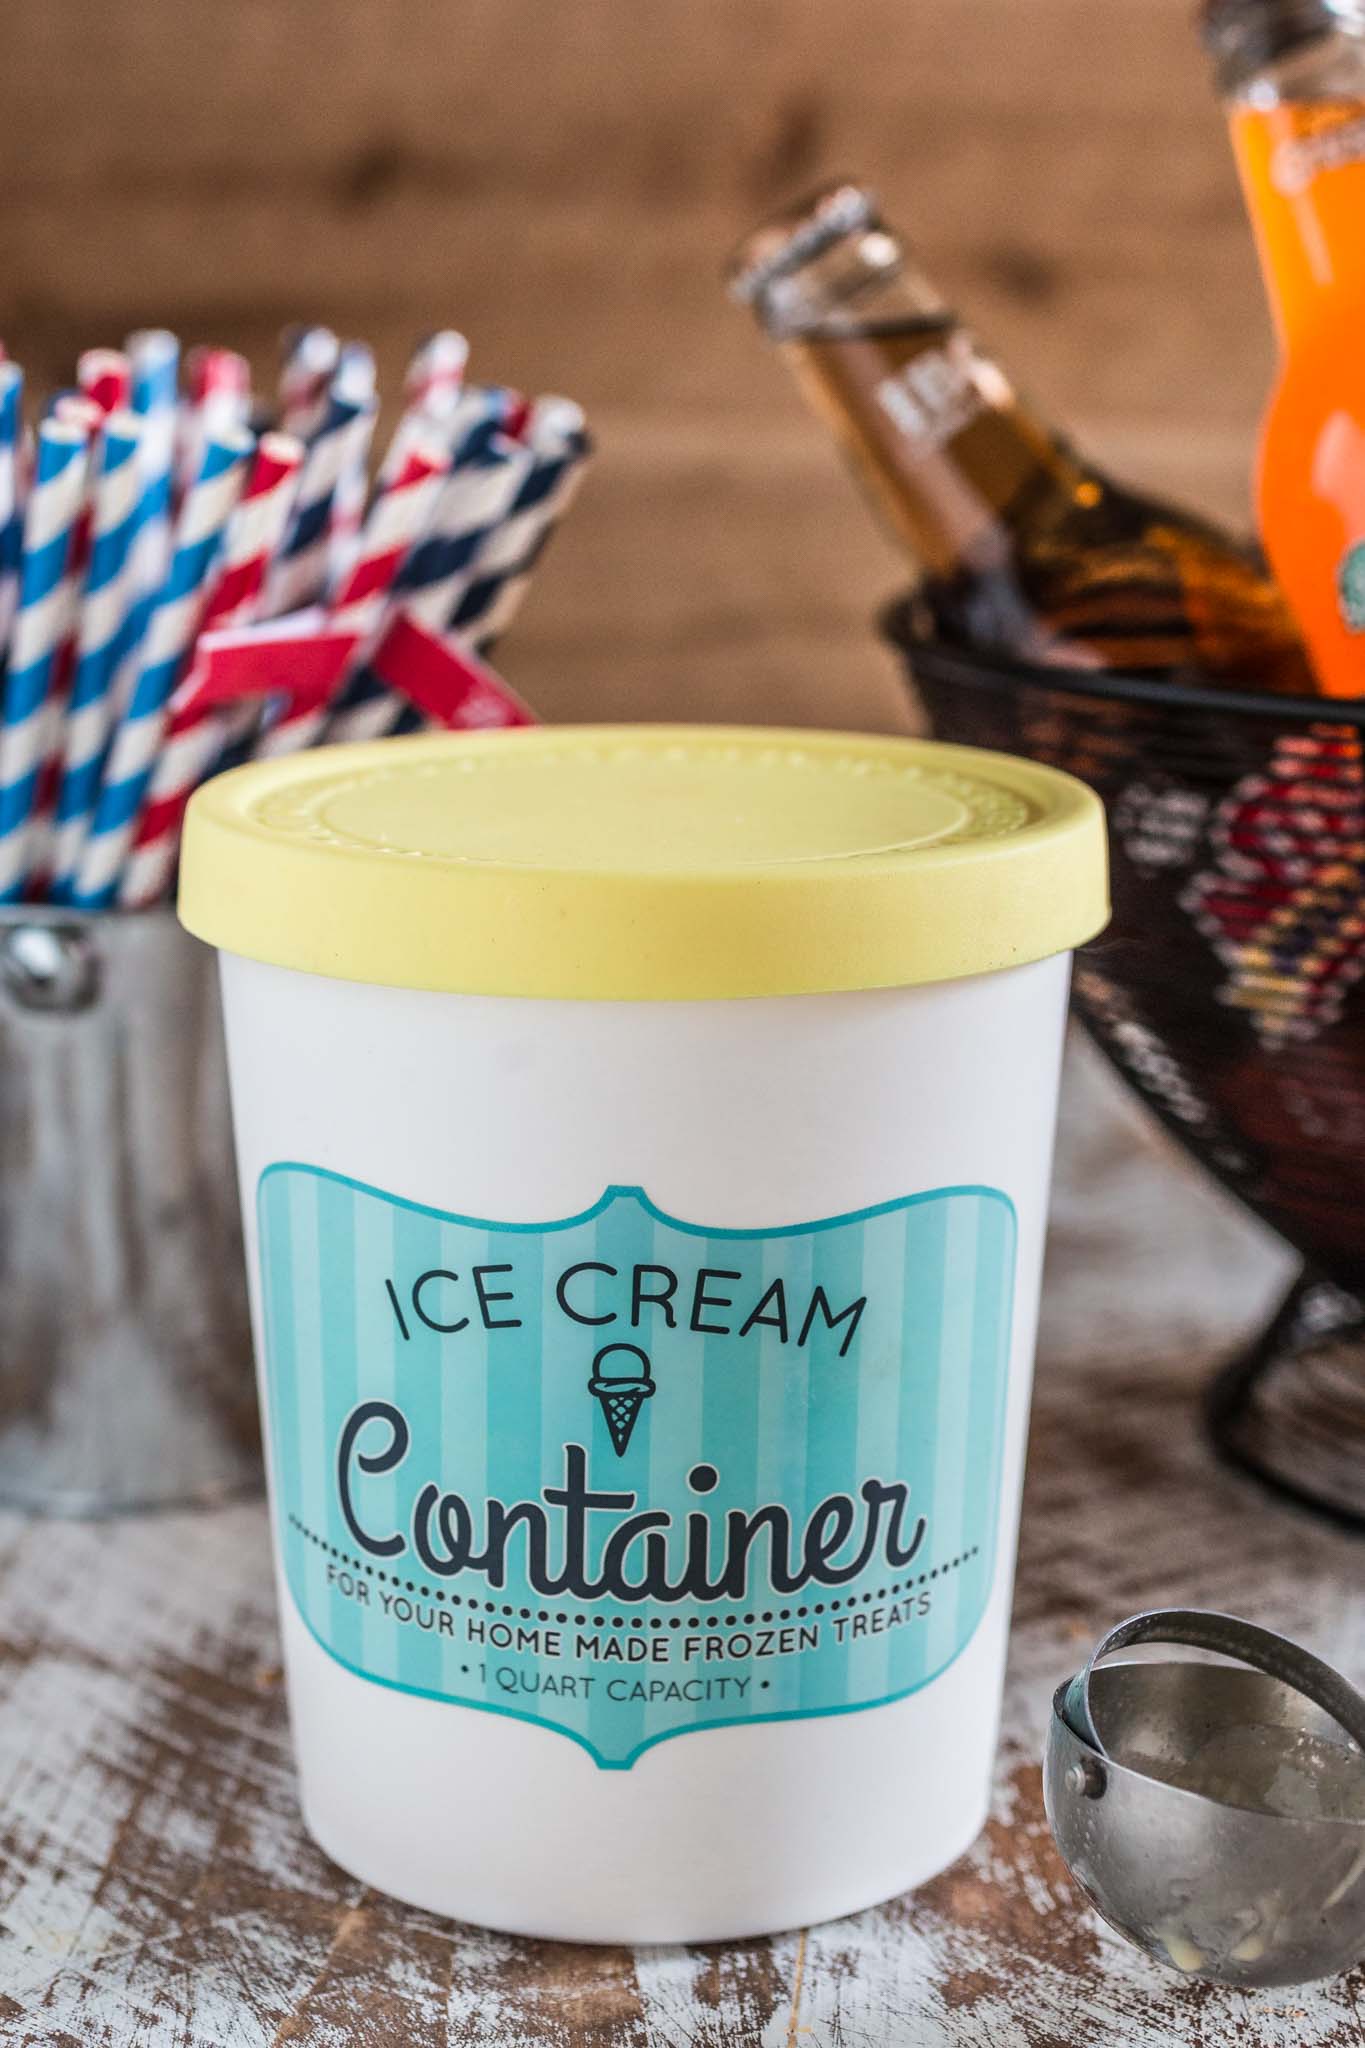
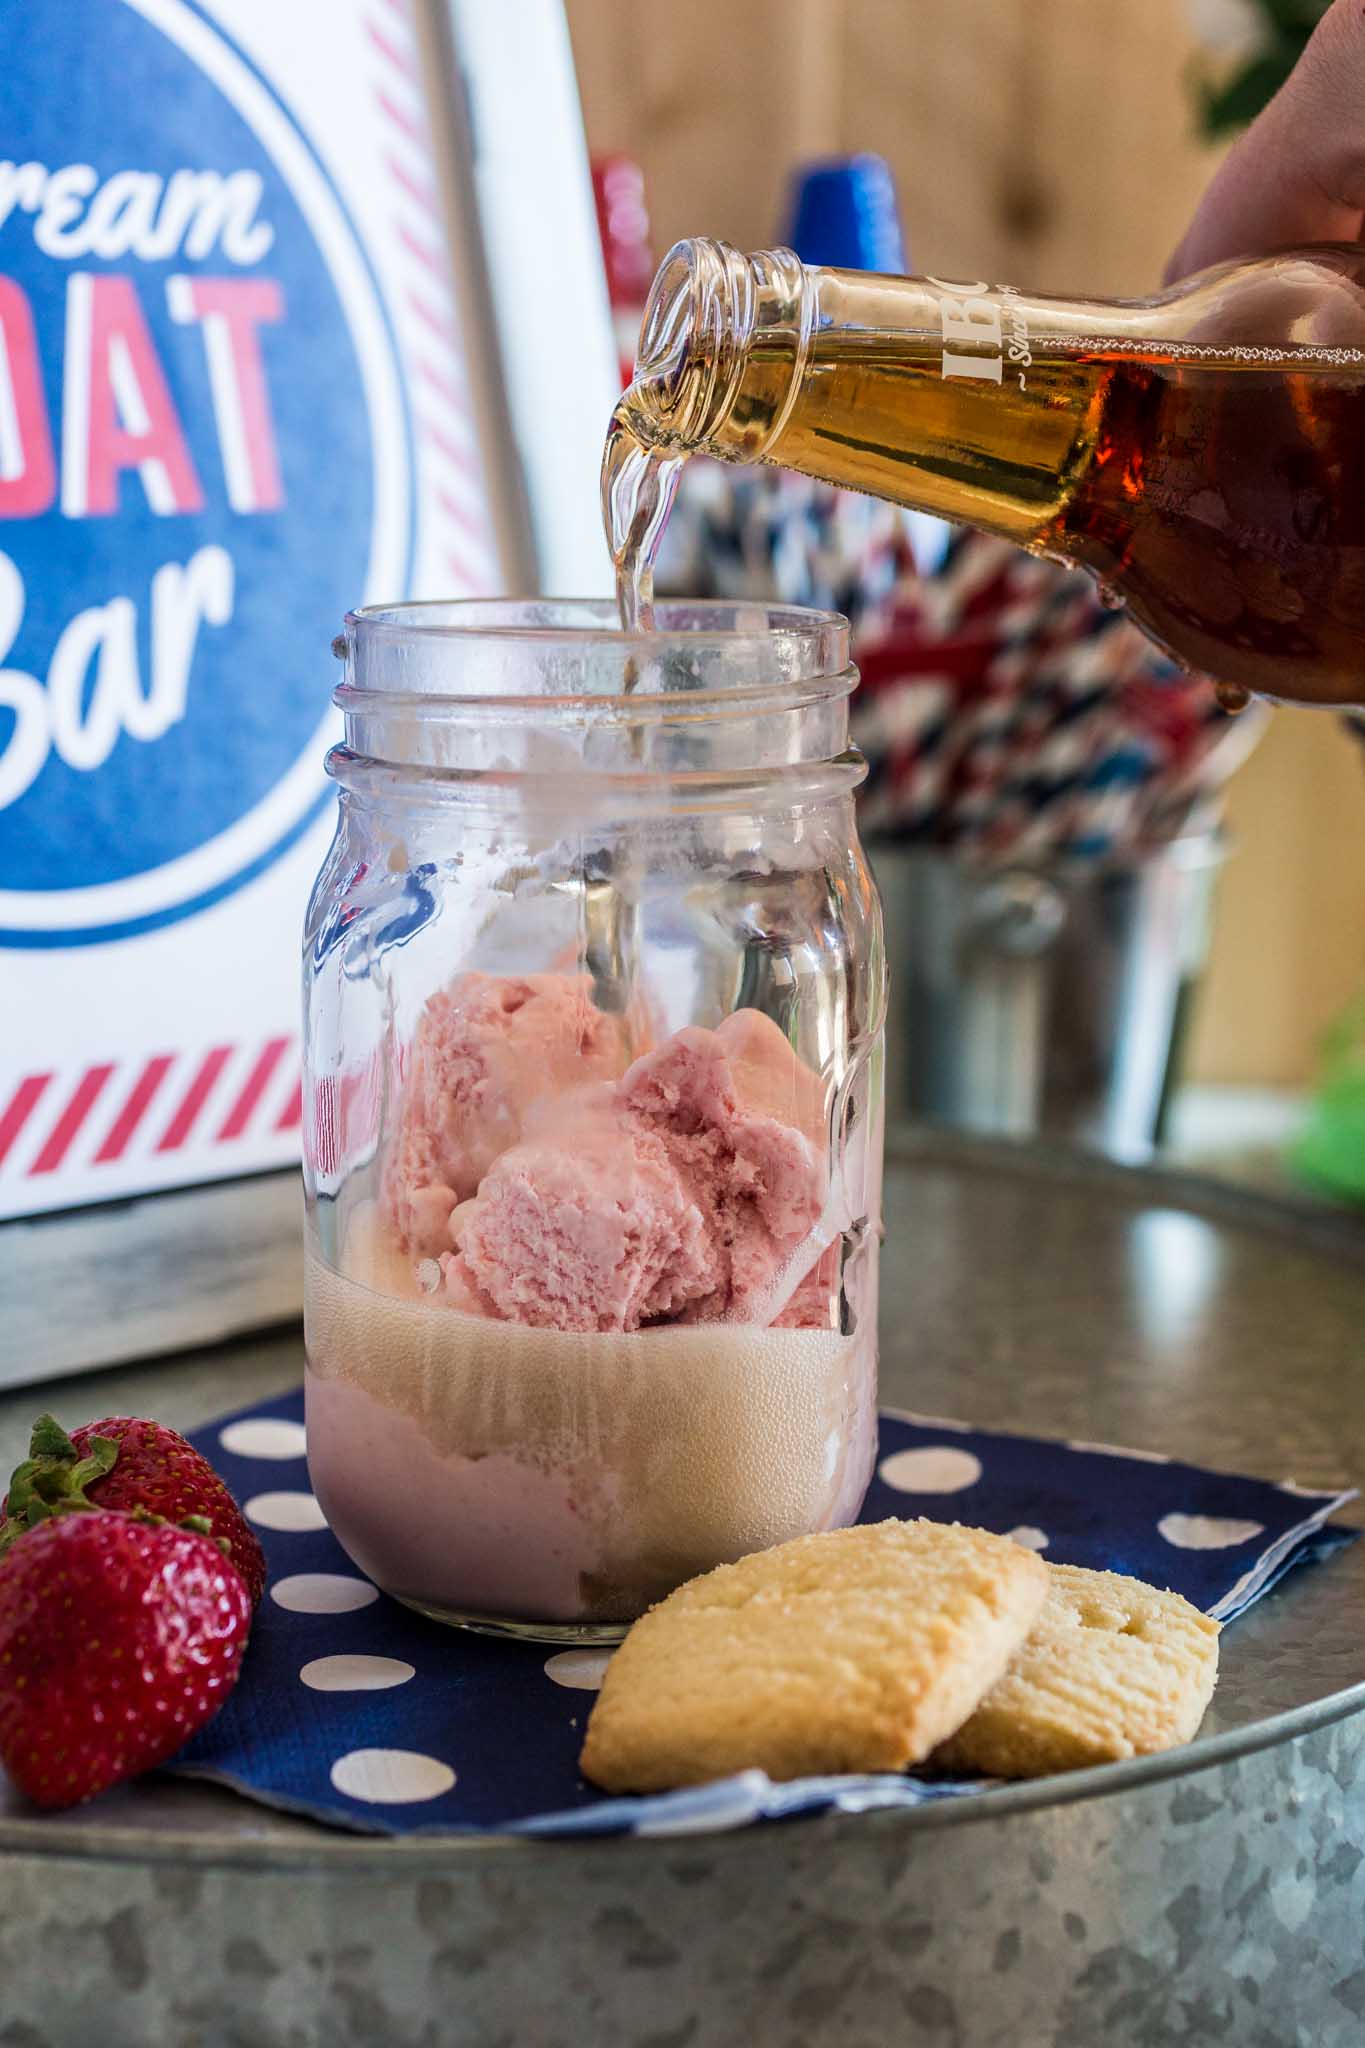
Stick to the basics here. You can’t go wrong with vanilla, chocolate and strawberry! These classic flavors, combined with a good variety of beverages, will create inumerous possibilities of delicious ice cream floats! But don’t let my simplicity stop you if you are crazy about bold creations. If a Pistachio Ice Cream Float is what your heart wants, then by all means, get the pistachio ice cream. The beauty of a Build-Your-Own station is that you get to go as simple or as crazy as you’d like! For the sake of practicality, you could pre-scoop the ice cream and leave it in the freezer until ready to serve. When it’s party time, all you need to do is place the pre-scooped ice cream in a cute vintage bucket or container. That is especially recommended if you’re serving kids, as it minimizes the mess that will result from them scooping their own ice cream.
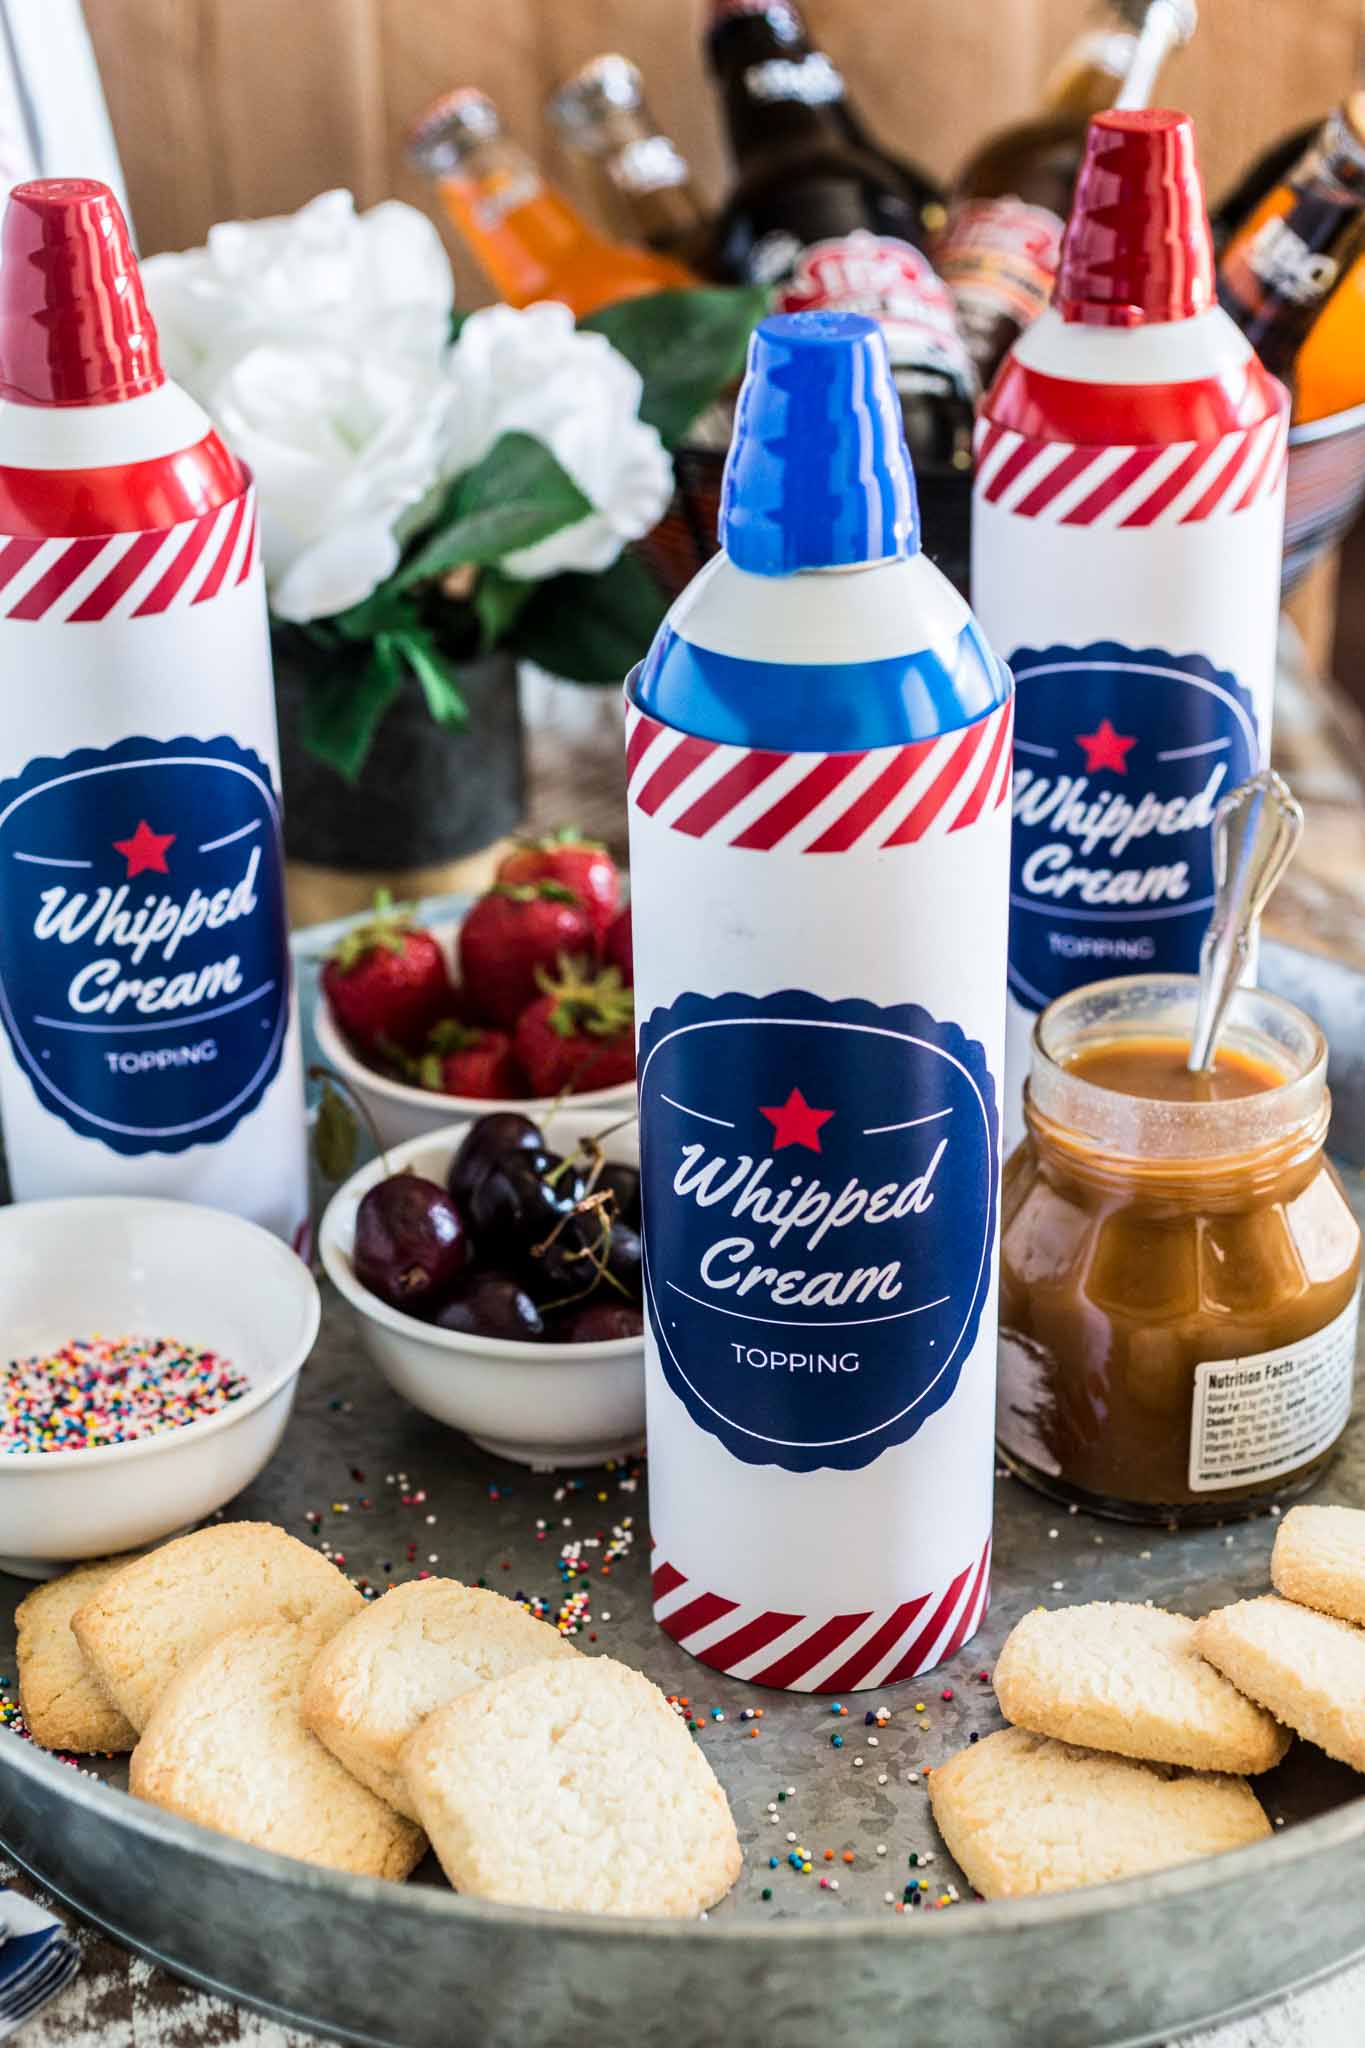
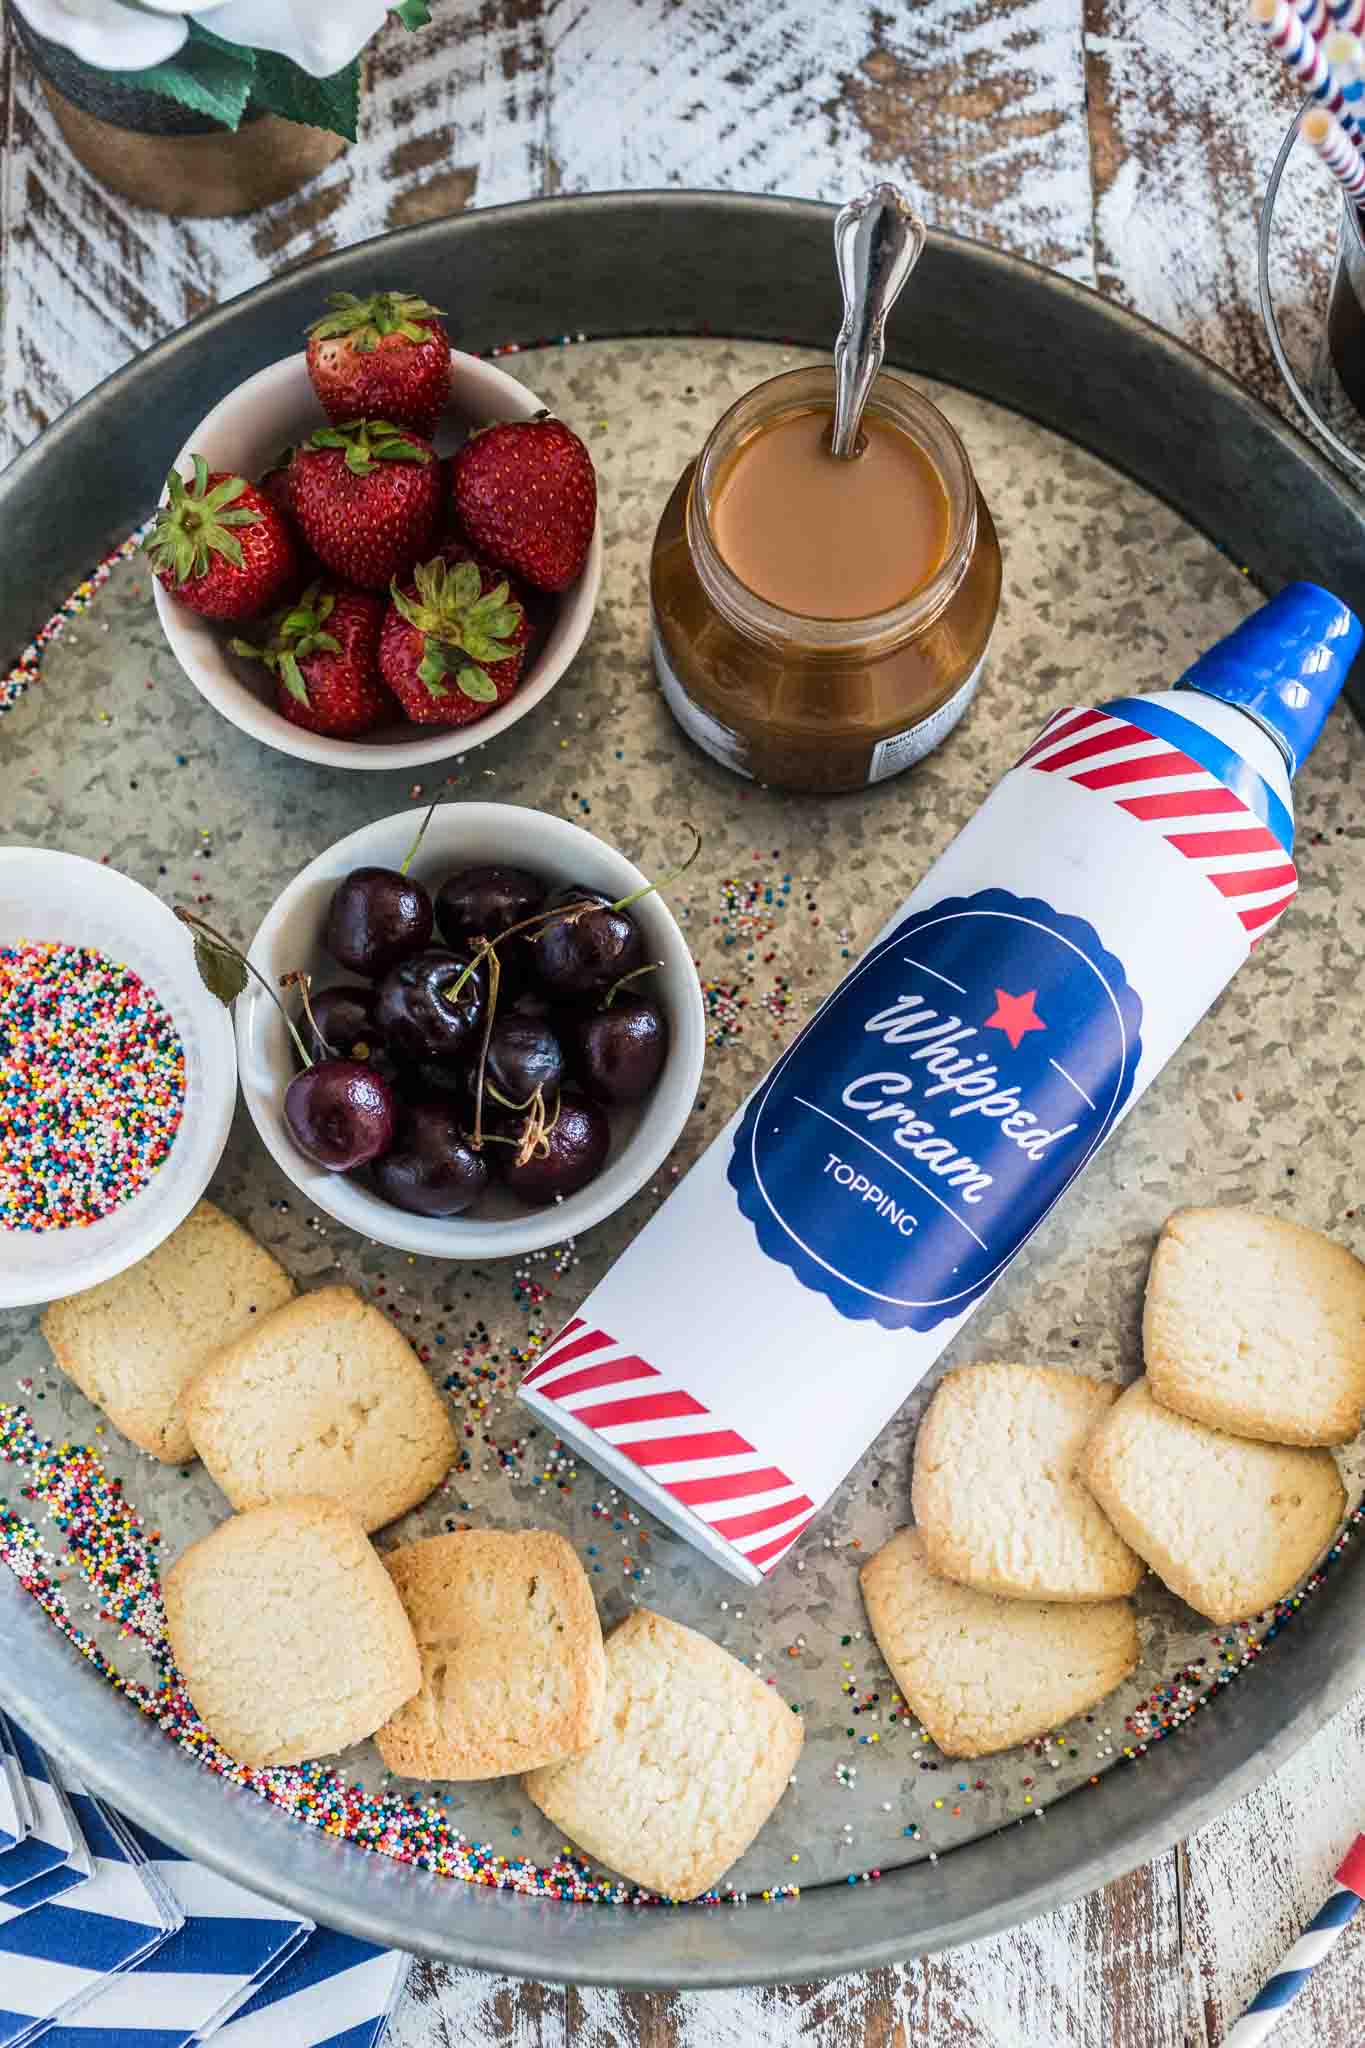
STEP THREE: Toppings
Now is the time to get creative! You can make a great ice cream float with basic ice cream and soda, but you gotta top it like a champ! Here’s a few ideas:
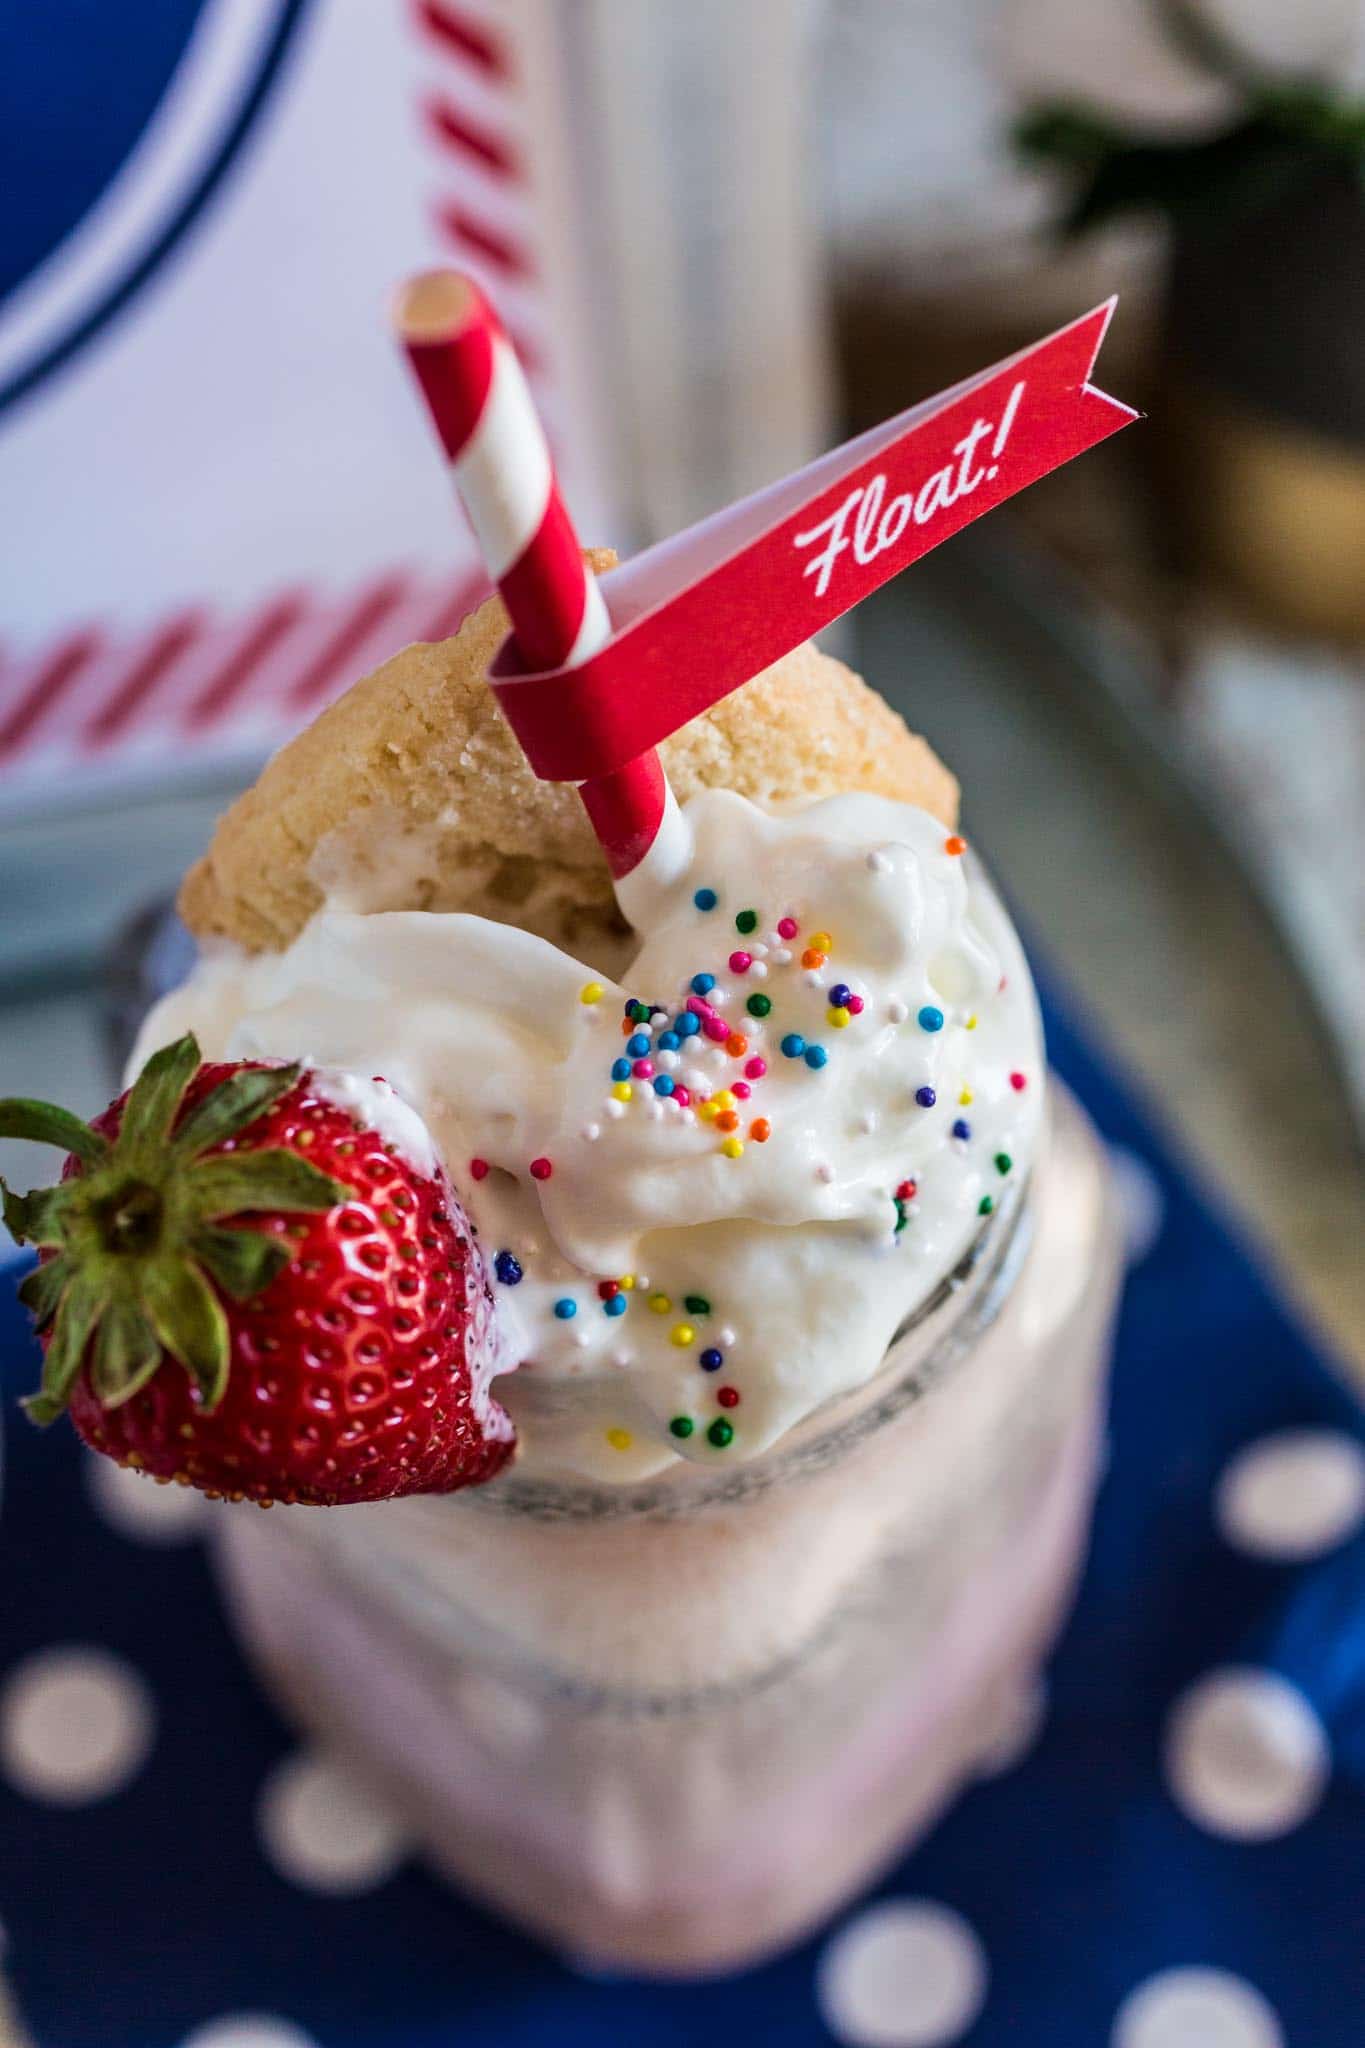
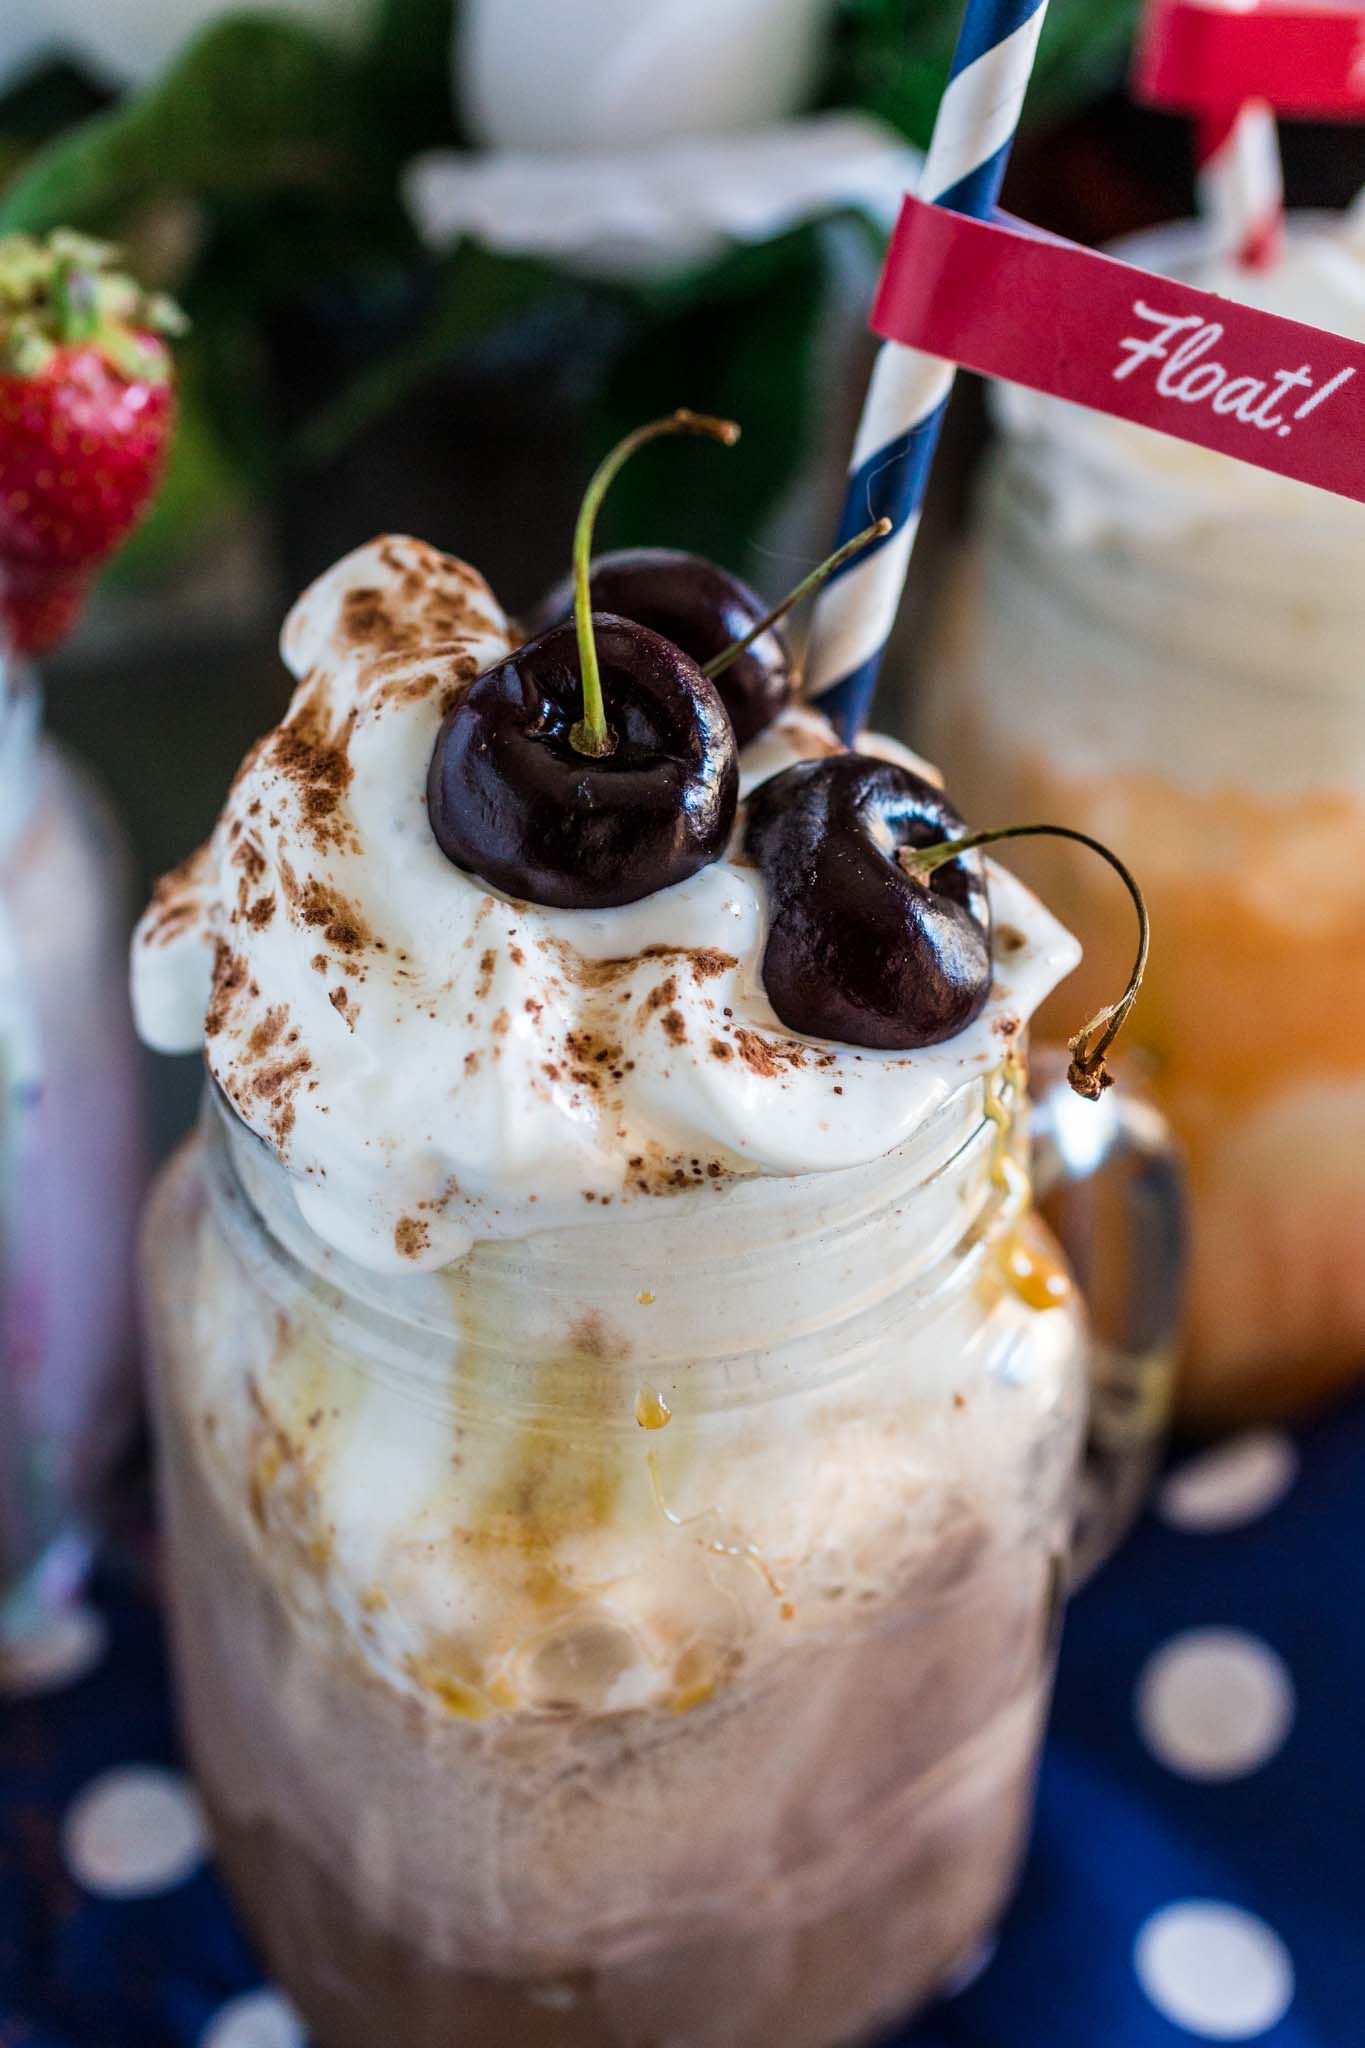
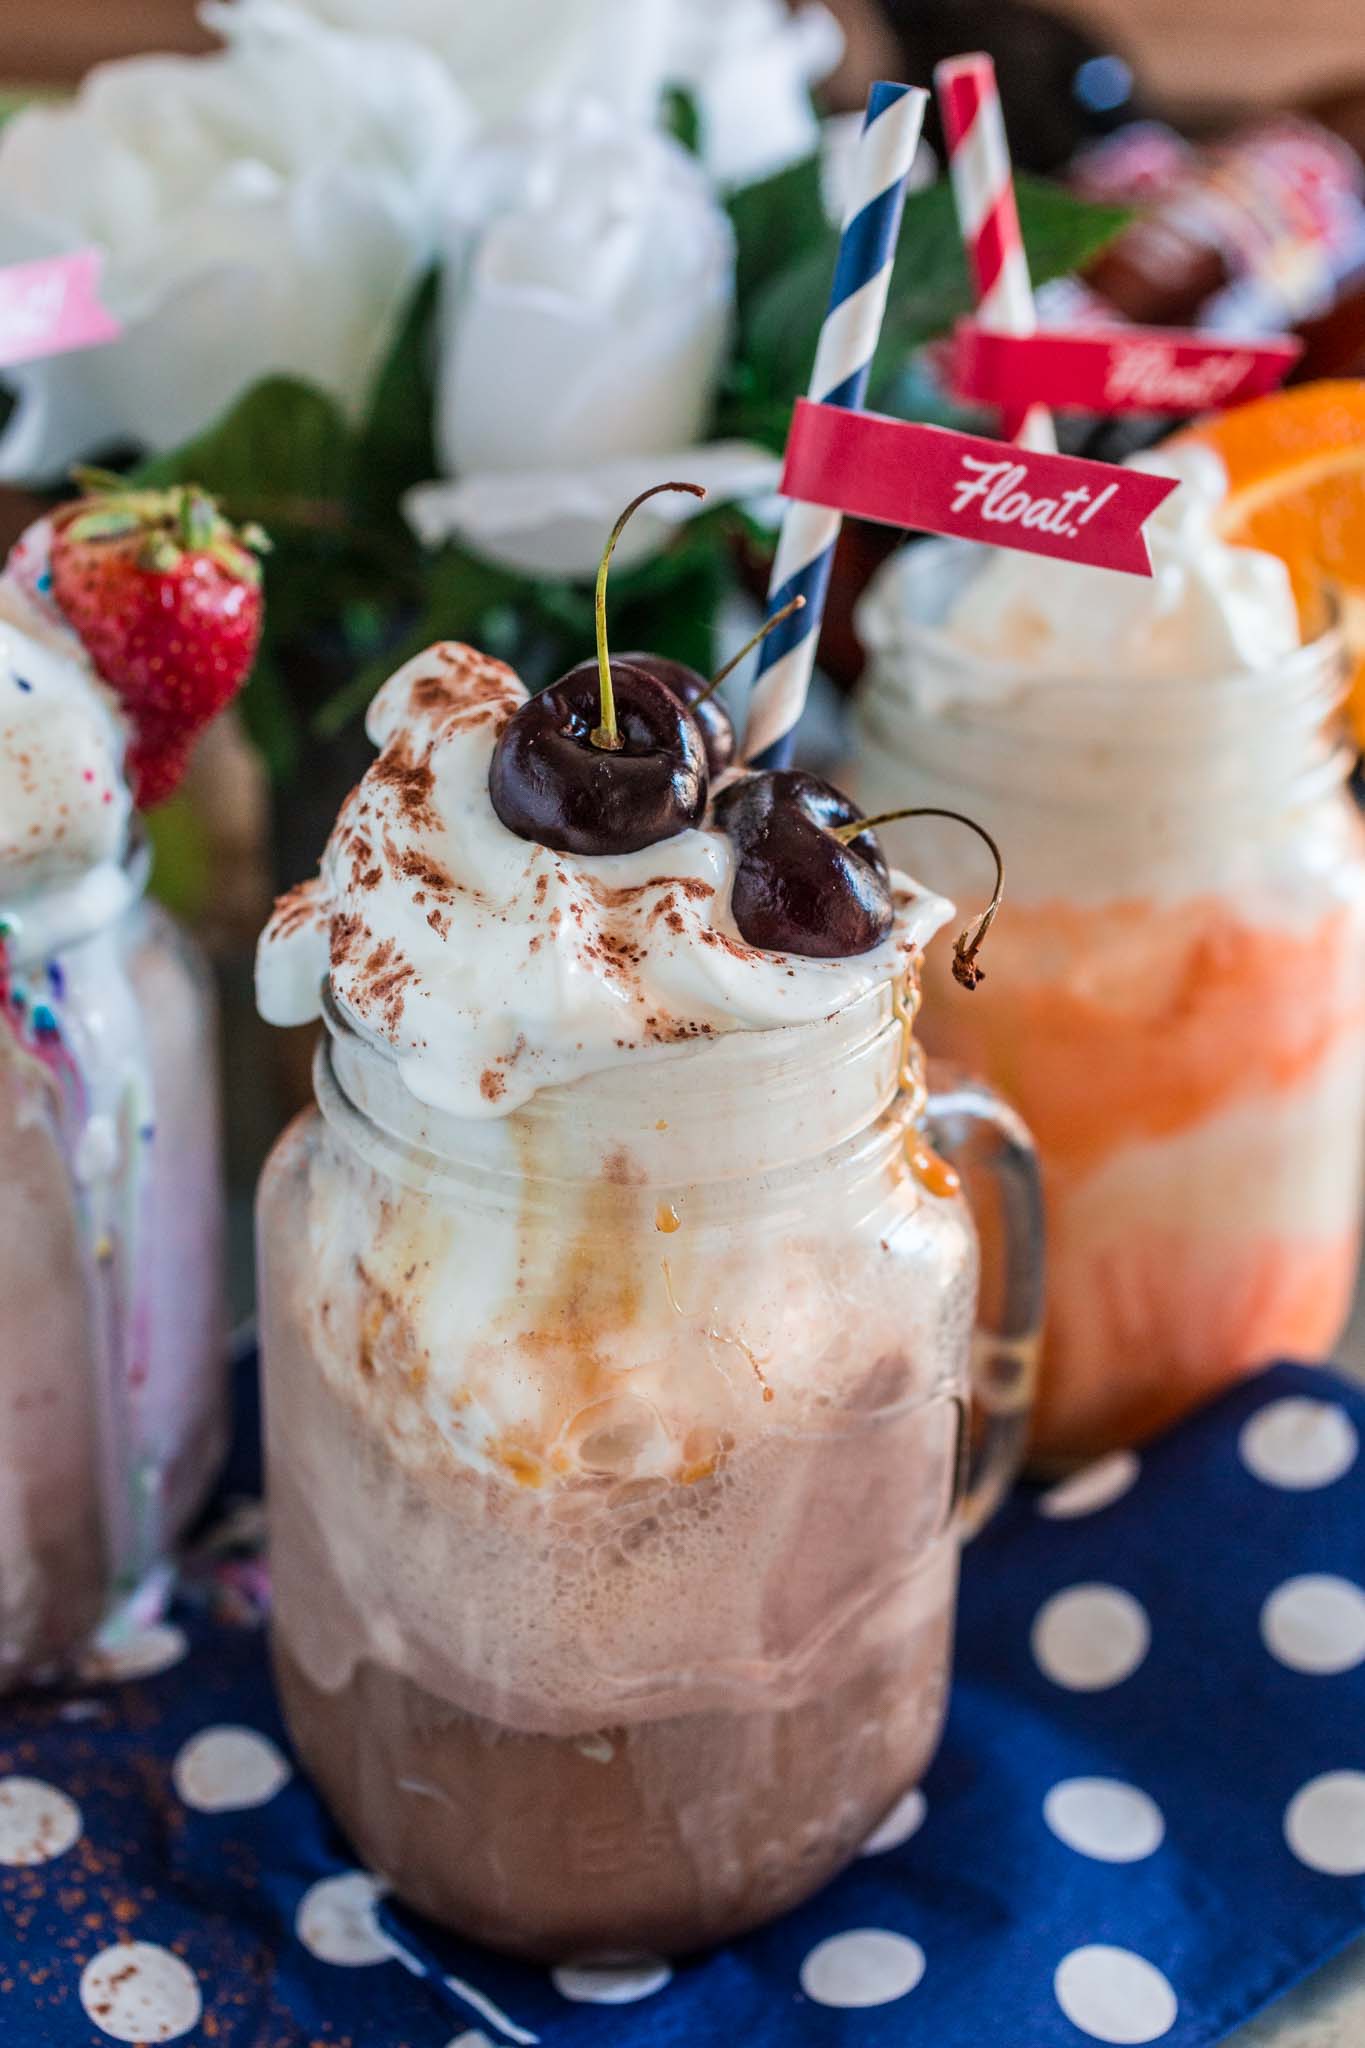
Whipped Cream (Duh! Gotta have it!)Pitted cherries (It’s summer time, so I went with fresh. But the classic is the jarred Maraschino cherry.)Sliced fruit, like strawberries, orange (for Creamsicle Floats), berries and/or bananas.Shaved chocolatePeanut butter cupsSprinklesCocoa powder for dustingChocolate syrupSalted Caramel sauceShortbread or sugar cookies
STEP FOUR: Suggest a few combos!
Every time I throw a Build Your Own party, there’s always a few guests that are shy and don’t know what to do with themselves. So I learned to suggest a few combinations to help them get started. You can either print out a suggested menu with a few recipes or even just a basic formula “2 scoops ice cream + soda + toppings”. Hopefully, after they get the hang of it, they will start having fun and creating some cool floats. These are a few of my favorite combinations:
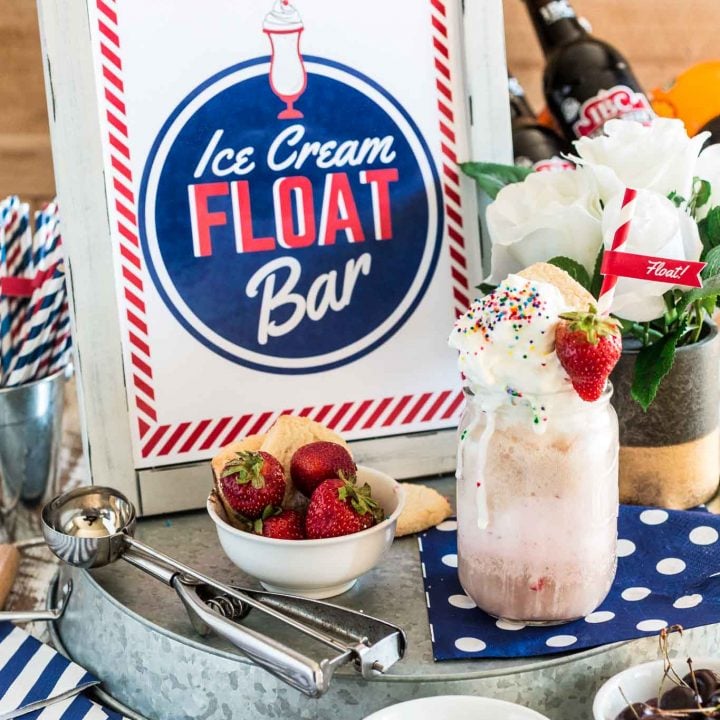
Classic Root Beer Float: vanilla ice cream + root beer + whipped cream + cherry on topCreamsicle Float: vanilla ice cream + orange soda + whipped cream + orange sliceStrawberry Cream Float: vanilla ice cream + strawberry soda + whipped cream + fresh strawberries + sprinkles + shortbread cookieStrawberry Cream Float Version 2: strawberry ice cream + cream soda + whipped cream + fresh strawberries + sprinkles + shortbread cookieChocolate Float: chocolate ice cream + cream soda or root beer + whipped cream + sprinklesSalted Caramel Root Beer Float: vanilla ice cream + root beer + whipped cream + salted caramel sauce
And then we can start getting a little crazy:
Cookies and Cream Float: cookies and cream ice cream + cream soda + whipped cream + crushed oreosHarry Potter’s Butter Beer: vanilla ice cream + butterscotch soda + whipped creamPeanut Butter Float: peanut butter ice cream + root beer + whipped cream + peanut butter cupsKey Lime Float: lime sherbet + lemon lime soda + whipped cream + lemon sliceCherry Cheesecake Float: cream cheese ice cream + cherry soda + whipped cream + crushed graham crackers + cherry
Seriously, I could go on and on for DAYS! The sky’s the limit where ice cream floats are concerned and I love watching my guests to see what they are coming up with! Be the hero of your family with these products and create a sweet treat to celebrate every day.
STEP FIVE: Decoration
This is my favorite part, as I always loved a good themed party! These are a few suggestions of retro decorations, 50’s diner style. You can keep it simple or go full-on party monster, if that fits your style/budget.
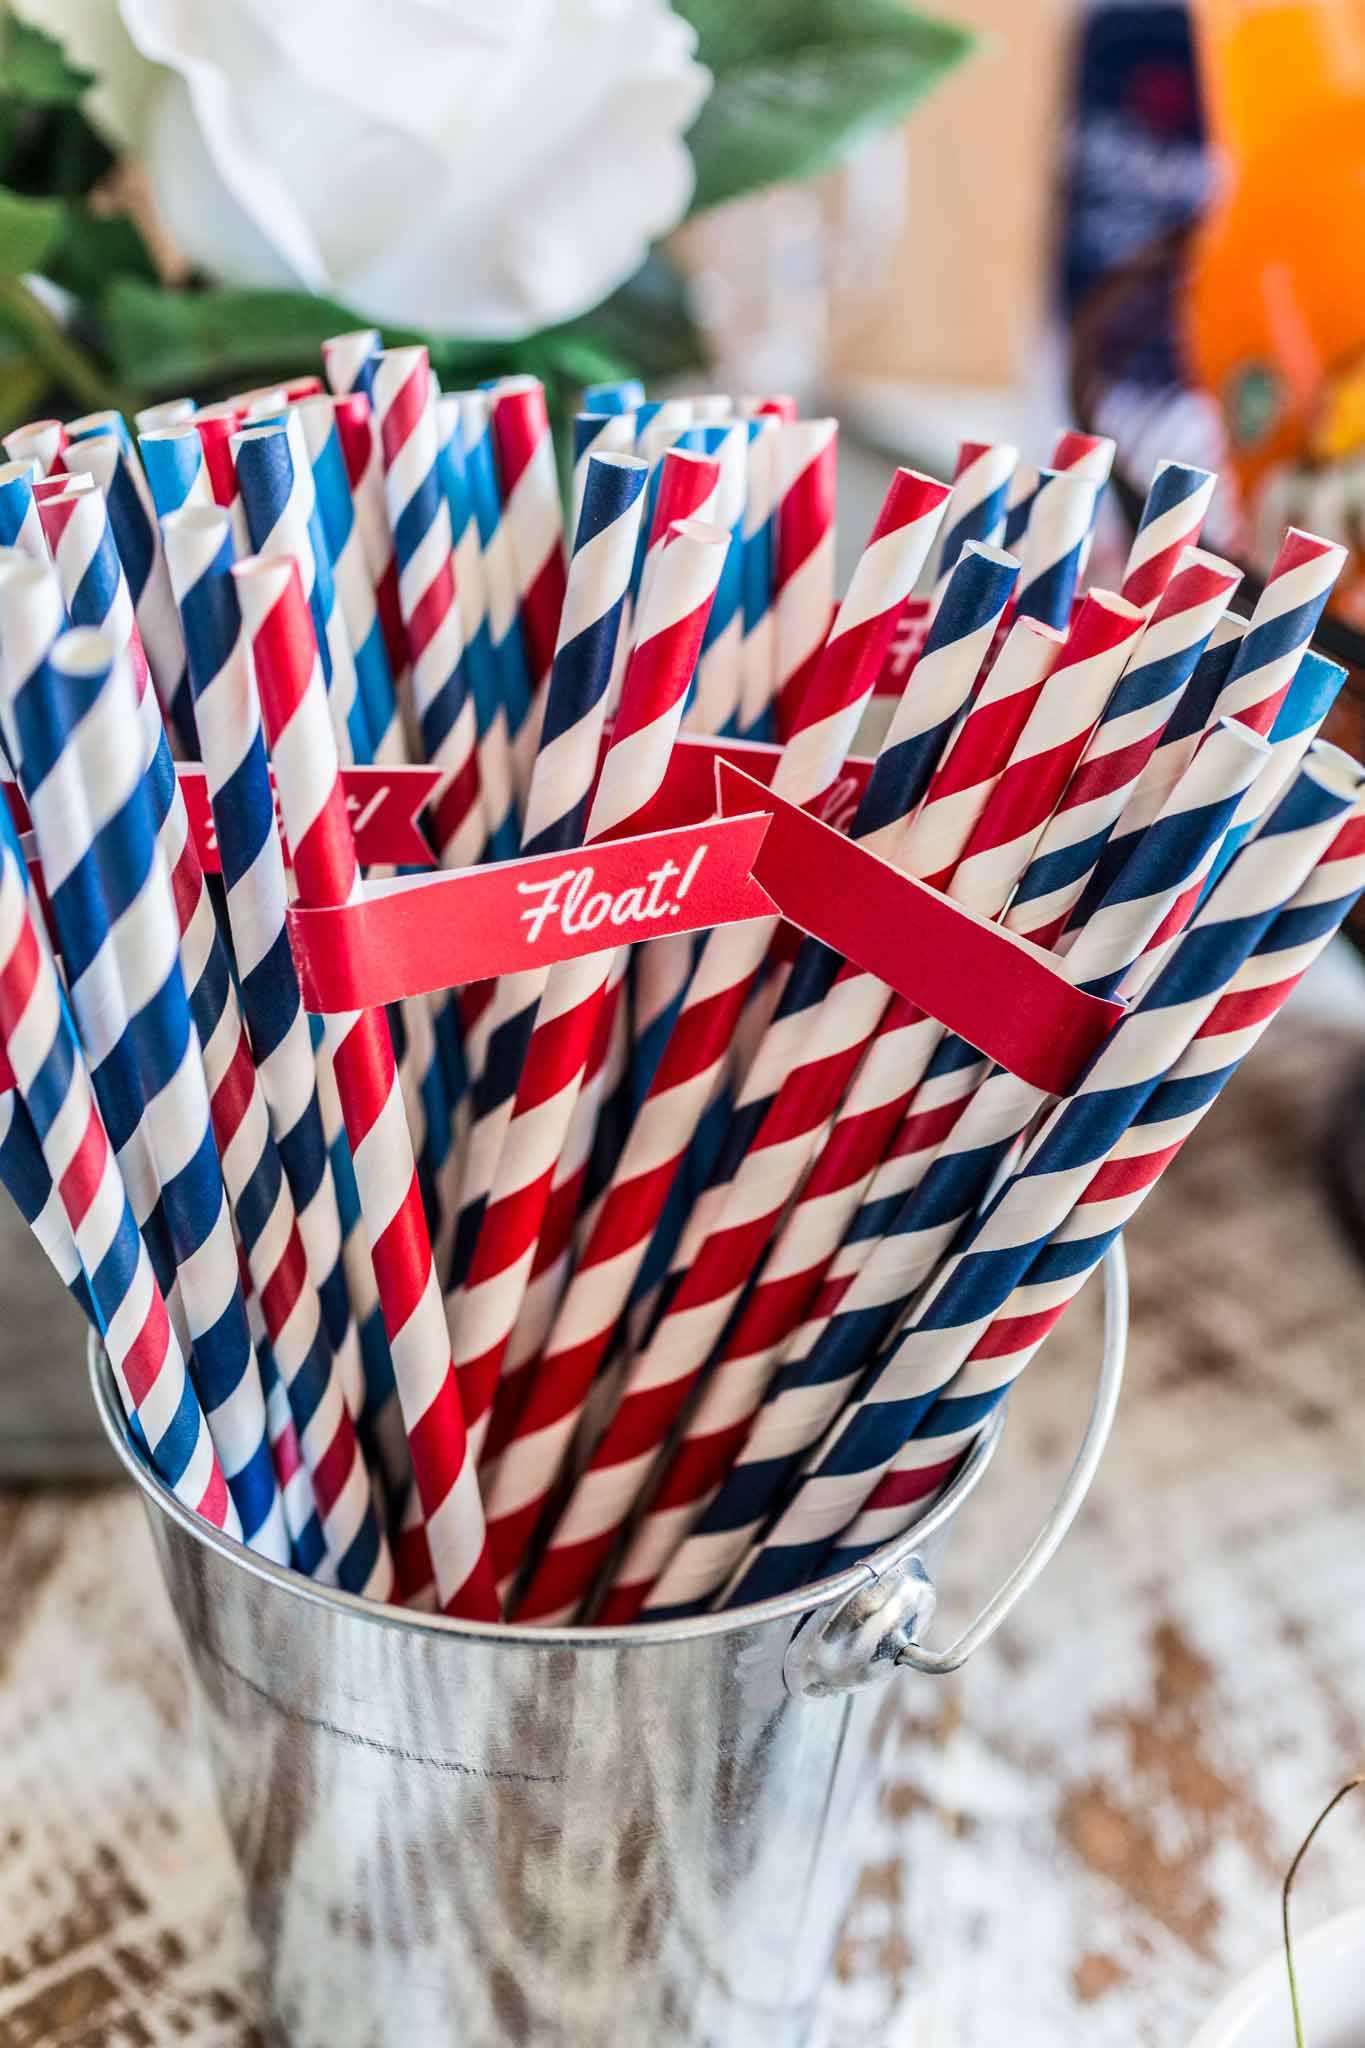
Glasses: some vintage milkshake style glasses or retro soda glasses are ideal, but any tall glasses will do. Just make sure you have enough for all your guests!Long ice-tea spoonsFun retro party strawsFun retro napkinsVintage ice cream scoopRetro ice cream containers/bucketsOld Fashioned napkin and straw dispensersRetro diner check pads (you can write the recipes here)A jukebox! (One can dream, right?)Retro metal Open/Closed sign
If you’re anything like me, you won’t miss the opportunity to also dress up in a vintage-inspired outfit. After all, you gotta look the part, right?
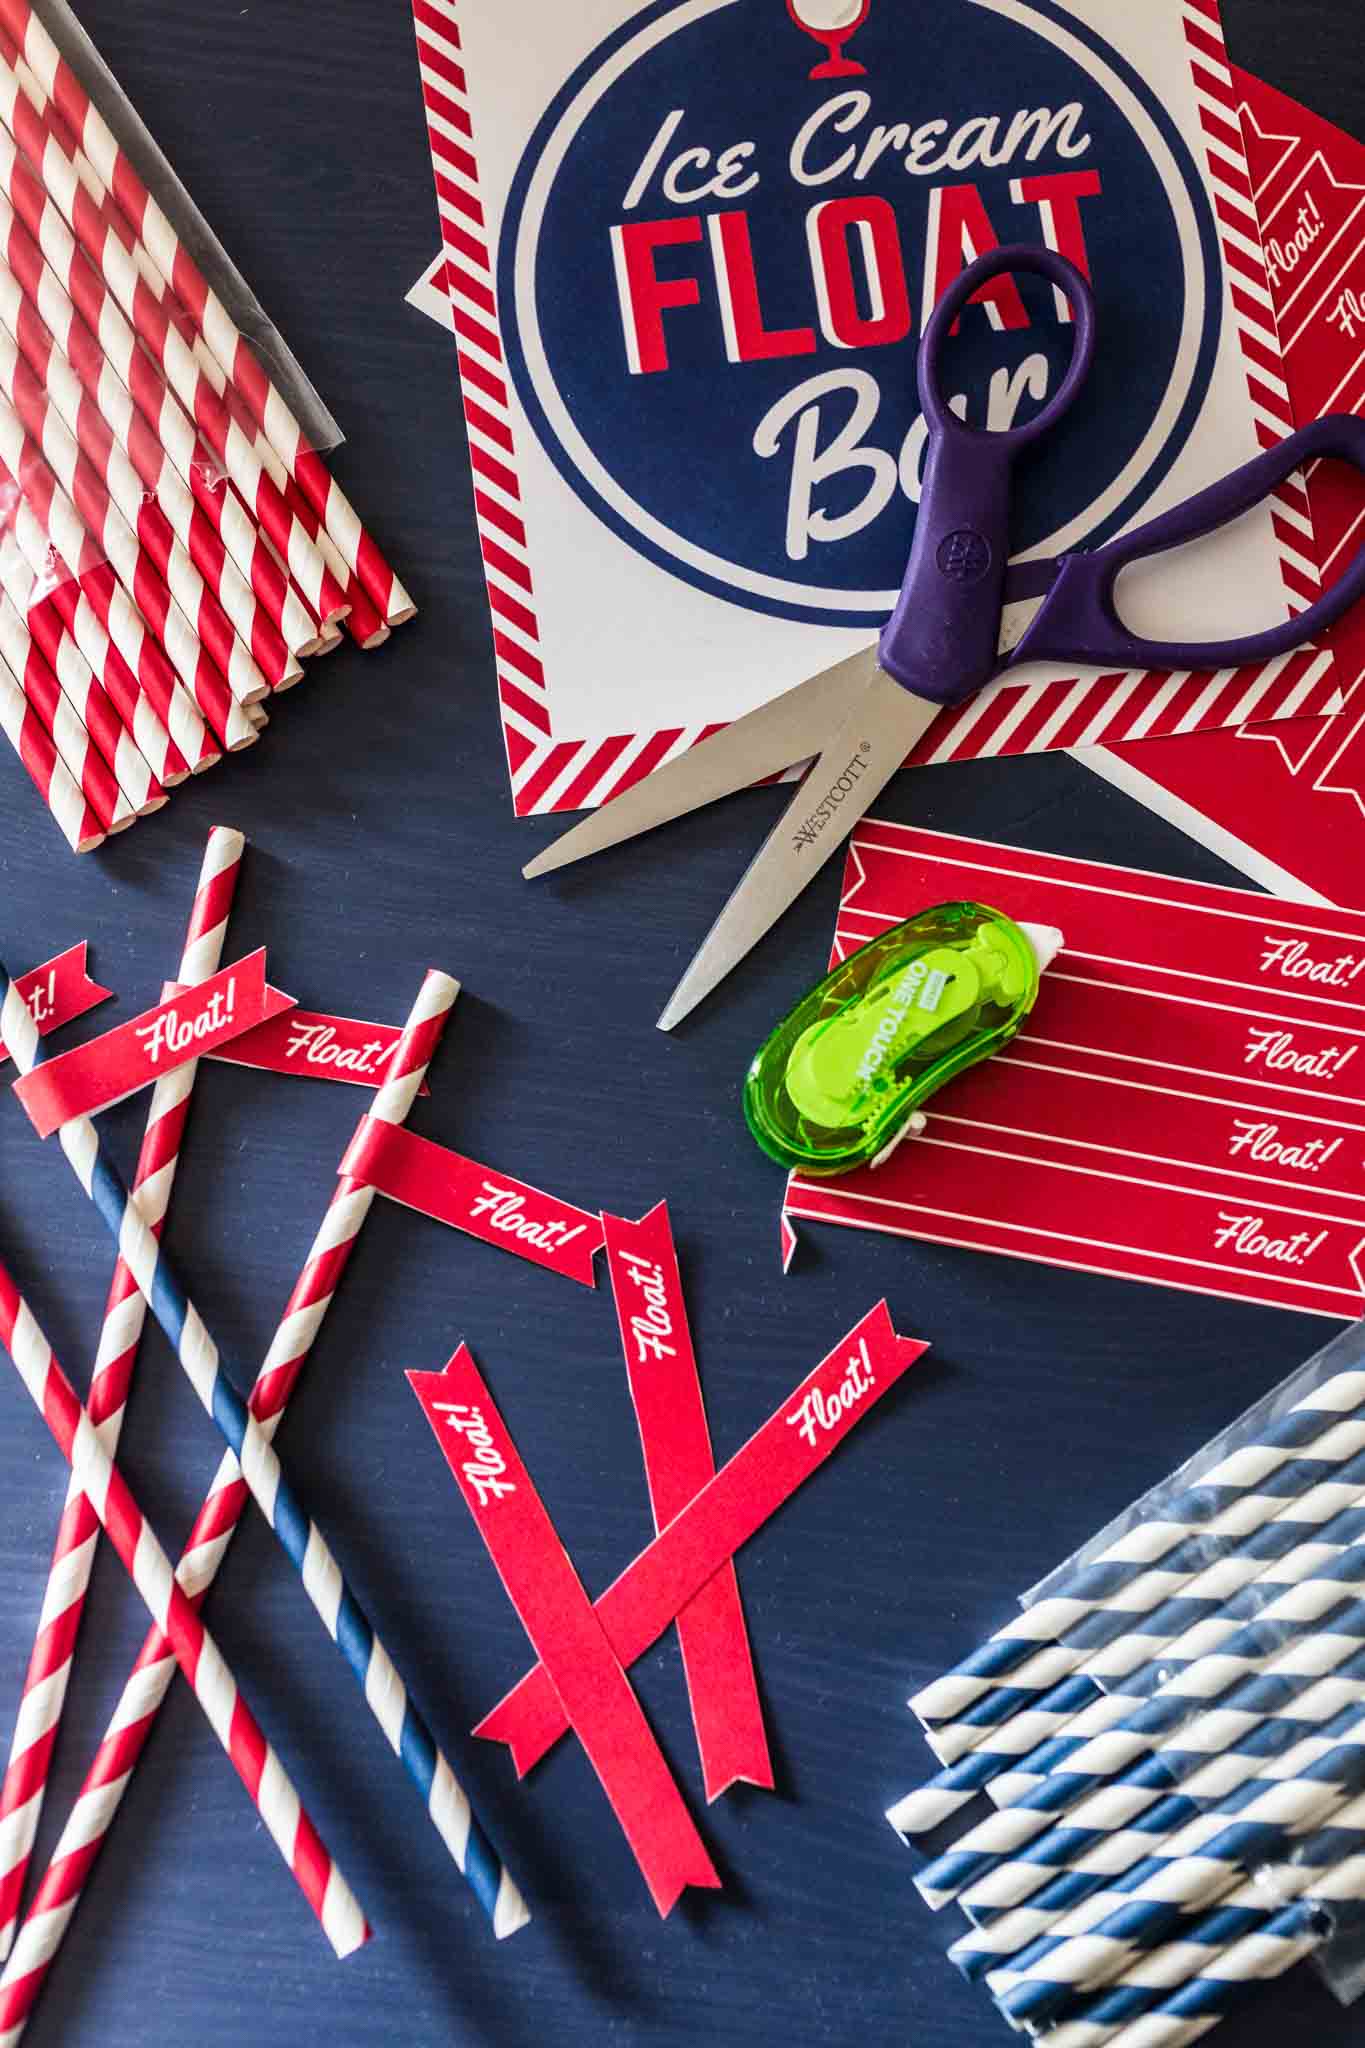
FREE PRINTABLES
In addition to these decorations/props suggestions, I created some printables to make your Ice Cream Float Bar even more festive. There’s a sign, some labels for the whipped cream canisters and some paper straw flags. Just download the PDF files, print them out and have fun decorating your party!
I hope you guys enjoyed this Build-Your-Own Bar idea! I had a lot of fun setting up this party and my guests had even more fun enjoying delicious ice cream floats on a hot summer day. But now, tell me. What kind of ice cream+soda floats your boat? Share your favorite flavor in the comments below!